Rudolf Slippers Free Knitting Pattern

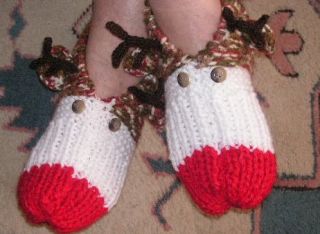
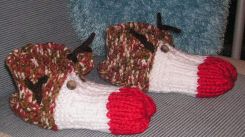
Celebrate Christmas with everybody’s favorite reindeer! These Rudolph slippers are great for giving as a gift.

You Will Need:

1 skein of Chunky type yarn any color. I chose a mottled yarn in browns and greens.
1 skein of chunky white
Small amount of chunky red
Small amunt of double knit type yarn in brown
2 buttons for eyes
Size 10 (6mm)knitting needles, large plastic needle, regular sewing needle and thread and 2 decorative buttons. This makes one pair of slippers.


Tension 4 sts and 6 rows (3 garter stitch ridges) = 1 inch

Available in small, medium and large size

Outer Moc:
Cast on 29 (35-41) sts with mottled yarn
Row 1: Knit across.
Row 2: K9(11-13), *P1,K9(11-13), repeat from *once more.
Repeat rows 1 and 2 until  20 (24-28) rows have been knit.
Change to white and work until 30 (34.38) rows have been knit

Shape Toe:
continue in white
Row 1: P1, *K1,P1, repeat from *across row
Row 2: K1, *P1,K1, repeat from *across row
Repeat these 2 rows until you have 6 rows (8-10) then change to red and work 6 (4-6) rows then work row 1 once more, cut off yarn leaving an 8” end.

Finishing:
Draw 8” end through remaining sts and pull up tightly, then sew with large plastic needle from beginning of ribbing to form toe. Fold cast one edge in half and sew inside seam for center back

To make the antlers I used a 4 st i-cord. After working 4 rows, I slipped 2 sts to a cable needle, working with the remaining 2 sts on my working needles, increased using the Make 1 increase. The next row, I increased again to regain 4 sts. After 4 rows, I repeated the above and once I had regained 4 sts a second time I broke my yarn, wove it through my remaining sts and pulled tight and secured. I then picked up my first 2 sts from the cable needle and working in i-cord, increase using Make 1 (3 sts) work 4 rows and break yarn, weave through remaining sts, pull tight and secure. Repeat for 2 set of slipped sts on cable needle for 2nd antler branch. Repeat for all four antlers.

 I had great fun knitting these Rudolf slippers hope you do too!

Knit A Christmas Bookmark

Make a bookmark for yourself or someone special.

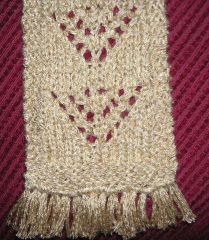
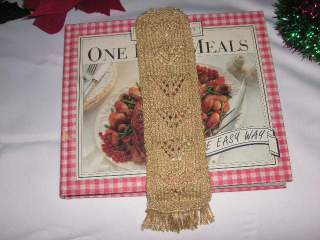
 Bookmarks are very fashionable these days and are a great gift for the readers in your life. With super fine yarn, and a little ingenuity, this simple bookmark can be made by anyone. There are no fancy stitches needed for this project, this lace pattern is very easy but effective so you don’t have to be an expert to finish it. The finished project will resemble a miniature scarf.
I chose a gold colour with a shiny gold thread running through it, but knit in any color this is a great, useful and quick project.


You will need:

Size 3.25mm Needles
Cotton type yarn.
Gauge: 8 sts = 1inch St st on 3.25mm needles
although gauge is not essential for this project.


cast on 19 sts and work 8 rows knit.

Begin Pattern:
Row 1.  (RS) knit
Row 2. and all wrong side rows K3, P13, K3
Row 3.  Knit
Row 5. K7, K2tog, yo,K1, yo, ssk, K7
Row 7. K6,K2tog, yo, K3, yo, ssk, K6
Row 9. K5,( k2tog, yo,) twice, K1, (yo, ssk,) twice, K5
Row 11. K4, (K2tog, yo,) twice, K3, (yo, ssk,) twice K4
Row 13. K3, (K2tog, yo) three times, K1, (yo, ssk) three times, K3
Row 14. K3, P13, K3
These 14 rows form the pattern repeat 6 or 7 times to rquired length

Shape Top:
Row 1. Knit
Row 2. (K3, K2tog) 3 times, K4 (16sts)
Row 3-5 Knit
Row 6. K2tog twice, K8, K2tog twice (12sts)
Row 7-9 Knit
Row 10 K2tog twice, K4, K2tog twice (8sts)
Row 11. Knit
Cast off.

Finishing:
Fringe bottom edge as desired.
Press or block.

“ssk” means “slip, slip, knit”–that is, slip 2 sts one at a time as if to knit, put left needle through the front of these two sts, and knit them together through their back loops.


I hope you will enjoy knitting this little project as much as  I did.


                        Happy Knitting…Enjoy!


Ray of Sunshine Dress

This dress with it’s laced yolk and hem will have your little girl looking radiant.


Materials:I used Anchor delux baby in a sunshine yellow shade 1 (2, 3, 4) 100g balls but any sport, baby yarn that knits to gauge.
Needles: 3.5mm circular 60cm
Buttons: four, small
Gauge : 24 sts x 31 rows = 10 cm (4ins) over stockinette stitch.
Measurements and Sizes
Sizes to fit (years): 9-18 months (2-3, 4-5, 6-7)
Chest (cm): 50 (55, 60, 65)
Actual chest (cm): 70.5 (81.5, 92.5, 103.5)
Back length (cm): 44 (50, 56, 62)
Abbreviations:
k – knit
P – purl
K2tog – knit 2 together
yfwd – yarn forward.
M1 – make one
skpo -slip a stitch, knit the next stitch, pass the slipped stitch over
sk2po – slip one, knit two stitches together, then pass the slipped stitch over


This dress is worked from the top down and includes wrap and turns to create short row shaping. This technique is used to create shaping in the middle of the knitted fabric and in this case, it’s used to create the armholes.
Body
NOTE: work from the top down in one piece Using 3.5mm circular needle cast on 54 (66, 78, 90) sts. Do NOT join in the rnd
K two rows Cont in lace pattern as folls
Row 1 (RS): k
Row 2 and all alt rows: k3, p to last three sts, k3
Row 3: k3, * k3, yfwd, k3, rep from * to last three sts, k1, yfwd, k2tog.
Row 5: k3, * k3, [yfwd, k1] twice, k2, rep from * to last three sts, k3
Row 7: k3, * k3, [yfwd, k1] four times, k2, rep from * to last three sts, k3
Row 9: k3, * skpo, k2, yfwd, k2tog, k1, skpo, yfwd, k2, k2tog, rep from * to last three sts, k1, yfwd, k2tog
Row 11: k3, * k2, yfwd, k2tog, yfwd, sk2po, yfwd, skpo, yfwd, k2, yfwd, rep from * to last three sts, k3
Row 13: k3, * yfwd, skpo, k2, yfwd, sk2po, yfwd, k2, k2tog, yfwd, k1, rep from * to last three sts, k3
Row 15: k3, * k1, yfwd, skpo, k1, yfwd, sk2po, yfwd, k1, k2tog, yfwd, k2, rep from * to last three sts, k1, yfwd, k2tog
Row 17: k4, * k1, yfwd, skpo, k3, k2tog, yfwd, k1, yfwd, sk2po, yfwd, rep from * ending last rep, k1, yfwd, skpo, k3, k2tog, yfwd, k1, yfwd, k2tog, k3
Row 19: k3, * yfwd, k3, yfwd, skpo, k1, k2tog, yfwd, k3, yfwd, k1, rep from * to last three sts, k3
Row 21: k3, * [k1, yfwd, sk2po, yfwd] three times, k2, rep from * to last three sts, k1, yfwd, k2tog. 118 (146, 174, 202) sts
Row 22 (WS): k
Next row: k
Next row: cast off three sts, k to end. 115 (143, 171, 199) sts
Divide for armholes
Next row: k18 (21, 24, 29), cast off next 21 (28, 35, 41) sts pwise, k next 37 (45, 53, 59) sts, cast off next 21 (28, 35, 41) sts pwise, k rem 18 (21, 24, 29) sts
Break yarn and sl the last group of 18 (21, 24, 29) sts onto the opposite end of the needle
NOTE:these 36 (42, 48, 58) sts are for the back of the dress With RS facing rejoin yarn to these 36 (42, 48, 58) sts and work as folls:
Next row (RS): k2 (4, 6, 12) sts, then k twice in each st to last 2 (4, 6, 12) sts, k to end of row. 68 (76, 84, 92) sts.
Turn and work on these sts only as folls
Work shaping for armhole **
Next row: p twice into first st, p6 (8, 10, 12), w&t
Next row: k
Next row: p twice into first st, p12 (14, 16, 18), w&t
Next row: k to end
Next row: p twice into first st, p19 (21, 23, 25), w&t
Next row: k
Next row: cast on 2 (4, 6, 8) sts, p to end. 73 (83, 93, 103) sts
Next row: k twice into first st, k6 (8, 10, 12), w&t
Next row: p
Next row: k twice into first st, k12 (14, 16, 18), w&t
Next row: p
Next row: k twice into first st, k19 (21, 23, 25), w&t
Next row: p
Next row: cast on 2 (4, 6, 8) sts, k to end. 78 (90, 102, 114) sts **
Break yarn and rejoin to Front 37 (45, 53, 59) sts with RS facing
Next row (RS): k3 (7, 11, 13) sts, then k twice in each st to last 3 (7, 11, 13) sts, k to end of row, turn. 68 (76, 84, 92) sts
Work on these sts only as given from ** to **. 78 (90, 102, 114) sts
Place marker for beg/end of rnd and cont in st st (every rnd k) working in rnds across all the sts of the back and then the front. 156 (180, 204, 228) sts
Work 16 rnds in st st
Inc rnd: k19 (22, 25, 28), m1, k40 (46, 52, 58), m1, k38 (44, 50, 56), m1, k40 (46, 52, 58), m1, k19 (22, 25, 28). 160 (184, 208, 232) sts
Work 16 rnds in st st
Inc rnd: k19 (22, 25, 28), m1, k42 (48, 54, 60), m1, k38 (44, 50, 56), m1, k42 (48, 54, 60), m1, k19 (22, 25, 28). 164 (188, 212, 236) sts
Work 16 rnds in st st
Inc rnd: k20 (23, 26, 29), m1, k42 (48, 54, 60), m1, k40 (46, 52, 58) sts, m1, k42 (48, 54, 60), m1, k20 (23, 26, 29). 168 (192, 216, 240) sts
Work 16 rnds in st st
FIRST SIZE ONLY
Next rnd: k to end inc two sts evenly across rnd. 170 sts
SECOND, THIRD AND FOURTH SIZE ONLY
Inc rnd: k23 (26, 29) sts, m1, k50 (56, 62) sts, m1, k46 (52, 58) sts, m1, k50 (56, 62) sts, m1, k23 (26, 29) sts. 196 (220, 244) sts
Work 16 rnds
Inc rnd: k24 (27, 30), m1, k50 (56, 62), m1, k48 (54, 60), m1, k50 (56, 62), m1, k24 (27, 30). 200 (224, 248) sts
THIRD SIZE ONLY
Inc rnd: k27, m1, k58, m1, k54, m1, k58, m1, k27. 228 sts
Next rnd: k to end inc two sts evenly across rnd. 230 sts
FOURTH SIZE ONLY
Next rnd: k to end inc two sts evenly across rnd. 250 sts
Work 11 rnds
ALL SIZES
Cont in lace st patt on these 170 (200, 230, 250) sts as folls:
Rnd 1 (RS): k
Rnd 2 and alt rows: k
Rnd 3: * k5, yfwd, k5, rep from * to end of rnd
Rnd 5: * k2tog, k3, [yfwd, k1] twice, k2, skpo, rep from * to end of rnd
Rnd 7: * k2tog, k2, [yfwd, k1] four times, k1, skpo, rep from * to end of rnd
Rnd 9: * k2tog, k2, yfwd, skpo, k1, k2tog, yfwd, k2, skpo, rep from * to end of rnd
Rnd 11: * k2, yfwd, k2tog, yfwd, sk2po, yfwd, skpo, yfwd, k2, yfwd, rep from * to end of rnd
Rnd 13: * yfwd, skpo, k2, yfwd, sk2po, yfwd, k2, k2tog, yfwd, k1, rep from * to end of rnd
Rnd 15: * k1, yfwd, skpo, k1, yfwd, sk2po, yfwd, k1, k2tog, yfwd, k2, rep from * to end of rnd
Rnd 17: sl 1, * yfwd, k1, yfwd, skpo, k3, k2tog, yfwd, k1, yfwd, sk2po, rep from * to last rep, yfwd, k1, yfwd, skpo, k3, k2tog, yfwd, k1, yfwd, sl 2, remove marker, place second of these two sl sts back on to LH needle, k2tog, psso, replace marker
Rnd 19: * yfwd, k3, yfwd, skpo, k1, k2tog, yfwd, k3, yfwd, k1, rep from * to end of rnd
Rnd 21: * [k1, yfwd, sk2po, yfwd] three times, k2, rep from * to end of rnd
Rnd 22 and 23: k
Cast off loosely pwise.

Armhole edging
(alike) Working from the RS pick up and k 28 (32, 36, 38) sts around underarm
Cast off kwise
Finishing
Press lightly on WS or according to ball band instructions. Sew in all ends. Sew the three cast off sts at bottom of back opening to the inside of the work. Sew buttons into place to correspond with buttonholes.

The wrap and turn abbreviated w&t, is the most common way of creating short rows. By wrapping the yarn around an adjacent stitch, rather than simply turning a piece over and knitting back the other way, one can prevent holes from forming in the finished work. If you’ve never worked short rows don’t let this put you off making this dress. Take a look at the free mini class at craftsy. Carol Feller, an expert knitwear designer, will show you four different short row methods: wrap and turn short rows, Japanese short rows, yarn over short rows and her own invisible short rows. You can watch each lesson on your schedule, as many times as you want, and ask Carol and your classmates questions along the way.Master short rows in no time – sign up for Short Rows today! Online Knitting Class

free short rows knitting class at craftsy.com

Knitted Childs Tuxedo

One for the boys! This Tuxedo is easy to knit and looks the part – perfect for that special occasion.

Sizes: 12 months (2 yrs, 3 yrs).
Materials: Worsted Weight Yarn: 100 grm black, and 50 grm white.
Knitting needles, sizes 4mm and 5mm.
seven white 5/8″ buttons, and two black 5/8″ buttons.
Gauge: 20 sts and 24 rows = 4 inchs in stockinette stitch on 5mm needles.
Back: With black yarn and size 4mm needles, cast on 46(52, 55) sts.
Work in k1, p1 ribbing for 12 rows.
Change to size 5mm needles, and inc 10 sts evenly across next row, knitting all sts (right side). Work even in stockinette stitch until piece measures 7(7 ½, 8 ½) inches from beg.
Shape Armhole: Cast off 4 sts at the beginning of next two rows.
Dec one st each side every right side row 3(4,5) times. 42(46, 47)sts remain.
Work even until piece measures 12 (13, 14) inches from beg.
Cast off.
Right Front: With black, and size 4mm needles, cast on 26(29, 31) sts.
Work in k1, p1,ribbing for 12 rows, increasing 5 sts evenly across last row.
Change to size 5mm needles.
With white, k 17, then knit 14(17,19) with black (right side).
Row 2: Purl across all black sts with black, then with white; (k3, p1) 3 times, end k5.
Row 3: With white, k5, (sl 1, p3) 3 times, then knit to end with black.
Repeat rows 2 and 3 for pattern. Work even until piece measures 7(7 ½, 8 ½) inches.
Armhole Shaping: Cast off 4 sts at armhole edge, then dec 1 st at armhole edge every right side row 3(4,5) times. Work even until piece measures 10 ½ (11 ½, 12 ½ ) inches.
Neck Shaping: Put 5 sts of button band on a stitch holder. Cast off 2 sts at neck edge on next right side row, then dec 1 st at neck edge on next two rows. Decrease 1 st every right side row 3 times 12(14, 15) sts rem. Cast off in respective colours.
Left Front: With black and size 4mm needles, cast on 26(29,31) sts.
Work in p1, k1 ribbing for 12 rows, making buttonholes on rows 5 and 9 of ribbing as follows: work to last 4 sts; yo, k2tog, rib 2. Increase 5 sts evenly across last row.
Change to size 5mm needles.
K14(17,19) with black, then knit 17 with white (right side).
Row 2: With white, k5, (p1, k3) 3 times; purl across all black sts.
Row 3: With black, knit all black sts; then with white, (p3, sl 1) 3 times, k5.
Repeat rows 2 and 3 for pattern, making first buttonhole in center of buttonhole band on row 5 of white, then every 10 rows. Decrease for armhole and neck same as right front, only reversing shapings. (Last buttonhole should end up just before buttonhole band sts are put on stitch holder).
Sleeves (make two): With size 4 needles and white, cast on 26 sts.
Work in k1, p1 rib for 4 rows. Change to larger needles and black. Starting stockinette stitch with a knit row, inc 8 sts across row (34 sts). Continue in st st , inc 1 st each side every 5(7,8) rows 7(8,9)
times. When sleeve measures 7(7 ½ ,8 ½ ) inches from beginning, start armhole shaping.
Armhole Shaping (follow respective size shaping):
Size 12 months: Castoff 3 sts at beg of next 2 rows, then 2 sts at beg of next 4 rows, then 1 st at beg of next 4 rows, 2 sts at beg of next 4 rows, then 3 sts at beg of next 2 rows. Cast off rem sts.
Size 2 yrs: Castoff 3 sts at beg of next 2 rows, then 2 sts at beg of next 4 rows, then 1 st at beg of next 4 rows, 2 sts at beg of next 2 rows, then 3 sts at beg of next 4 rows. Cast off rem sts.
Size 3 yrs: Castoff 3 sts at beg of next 2 rows, then 2 sts at beg of next 6 rows, work 2 rows even, then cast off 2 sts at beg of next 6 rows, then 3 sts at beg of next 2 rows. Cast off rem sts.
Finishing: Sew shoulder seams and side seams. Sew sleeve seams. Sew sleeves into
armholes.
Neckband: Pick up sts around neck as follows: With white, and size 4mm needles, work along sts of buttonband on right front (keeping band in garter stitch), pick up 12 sts along right neck edge, pick up 17(20,22) sts along back, 12 sts down left front, and along buttonhole band sts of left front (keeping this in garter st also). Work 5 sts garter st, p1, k1 rib to last 5 sts, then 5 sts garter st. Cast off loosely after 7 rows.

Bowtie: With size 4mm needles, and black, cast on 9 sts.
Row 1: (k1, p1) 4 times, k1.
Rows 2-4: repeat row 1.
Row 5: p2-tog, (k1, p1) twice, k1, p2-tog.
Row 6: (p1, k1) 3 times, p1.
Row 7: k2-tog, p1, k1, p1, k2-tog.
Rows 8-10: knit.
Row 11: k2, yo, k2-tog, k1.
Rows. 12-14: knit.
Row 15: knit then purl into first stitch, k1, p1, k1, purl then knit into last stitch.
Row 16: (k1, p1) three times, k1.
Row 17: purl then knit into first stitch, (p1, k1) twice, p1, knit then purl into last stitch.
Rows 18-21: (k1, p1) 4 times, k1.
Cast off.
Bowtie buttons onto top button of sweater.

 Now your little man can join the Gentlemans club!

Knit A Remembrance Poppy

You might have noticed that in November each year many people wear bright red paper poppies. What are the poppies for? And why November?

The First World War finally ended after four long and bloody years of fighting, on November 11 1918. The guns stopped on the eleventh hour of the eleventh day of the eleventh month.
Millions of people were killed in the war and millions more were injured. In the years since 1918, even more people have died in wars around the world including, of course, World War Two.

November 11 was chosen back in 1919 as the special day each year when we would all think about and remember those who had died. To this day, almost 100 years later, at 11am on November 11 many people across Britain stay silent for two minutes to think about those who died.
At first, November 11 was known as Armistice Day because ‘armistice’ is the word used for an agreement between enemies to stop fighting. These days it is more usually called Remembrance Day or Poppy Day.
Why poppies? The story begins back in 1915, during World War One.

A doctor called John McCrea, who was working to help soldiers in France, wrote a poem in 1915 about the poppies growing on the graves of dead soldiers.
 In Flanders’ Fields

In Flanders’ fields the poppies blow
Between the crosses, row on row,
That mark our place: and in the sky
The larks, still bravely singing, fly
Scarce heard amid the guns below.

We are the dead. Short days ago
We lived, felt dawn, saw sunset glow,
Loved and were loved, and now we lie
In Flanders’ fields.

Take up our quarrel with the foe;
To you from failing hands we throw
The torch; be yours to hold it high,
If ye break faith with us who die
We shall not sleep, though poppies grow
In Flanders’ Fields.

John McCrae, 1915.

An American poet called Moina Michael read the beautiful poem. It gave her the idea of using poppies to remember the dead but also to help the living at the same time.
Moina bought real poppies and gave them out to friends. She also sold some poppies and gave the money to surviving, needy ex-soldiers. The first official Poppy Day, organised by a charity called The Royal British Legion, was held in 1921.

How to Knit A Poppy To Remember

Size 3.5mm needles
Double knit type yarn A-red, B-green, C-black

Petals (make 4)
Using A, cast on 7 sts.
1st row (RS) K.
2nd row Kfb, k to last 2 sts, kfb, k1. 9 sts.
3rd row As 2nd row. 11 sts.
4th row As 2nd row. 13 sts.
5th–8th rows K.
9th row Ssk twice, k to last 4 sts, k2tog twice. 9 sts.
10th–12th rows K.
13th row As 9th row. 5 sts.
14th–16th rows K.
17th row K1, sk2po, k1. 3 sts.
18th row K. Bind off.
Center
Using B, cast on 16 sts. Bind off.

Finishing
Sew petals together in pairs, then position one pair over the other in a cross formation and secure. Coil center into a tight spiral and sew base to the center. Using C, work a ring of straight stitches radiating from the flower center, then work French knots around the outer edge of the stitched ring. Maintain the petals in a cup shape with a small stitch behind pairs of petals.

Stitch Explanation: Sk2po – Slip 2 stitches as if to knit together, knit 1, pass slipped stitches over

Ssk – Slip stitch then knit 1 and pass slipped stitch over.

Yeti Earflap Hat

  Be afraid of Yetis no more! This hat makes them downright adorable, the cold doesn’t stand a chance when it’s up against this “Yeti” hat, it will keep you toasty warm.


Size Newborn, (infant, child, adult)

You will need:
100 grmEyelash type yarn in white,
50 grm White double knitting type yarn
small amounts of black and blue double knitting type yarn.
At least 3 dpn and circular needle -I used 4mm but you need to use correct needle to obtain gauge.
Size 4.5mm & 3.5mm straight knitting needles for facial features.

Gauge : 19sts = 4 inches in stockinette stitch


Earflap Make 2.
With white eyelash yarn cast on 7sts.
Row 1 K1, purl to last st K1
Row 2 K1, knit front and back, knit to last 2sts, knit front and back, k1.
Repeat these 2 rows until 15sts.
Knit straight in st st a further until measures 2.75” (3”, 3.25” 4”).Break yarn.


Chart


HAT
With circular needle and eyelash yarn, cast on 10, (12, 14,16) sts, with right side facing, Knit across 15 sts of one earflap, turn, cast on 5 sts leaving eyelash yarn attached change to white double knitting and cast on 14,(17, 20, 25) sts, attach another ball eyelash yarn and cast on 5sts, turn, with right side facing, Knit across 15 sts of remaining earflap, turn, cast on 10, (12, 14, 16) sts; join to work in the round placing a stitch marker between first and last sts to mark beginning/end of rnds – 74,(81,88,97) sts.
Join, being careful not to twist stitches, place marker and begin knitting in the round. As you knit around this first row (keeping the double knitting section as set in the cast on row), you’ll notice four gaps, on either side of each ear flap. When you get to those, K2tog to close them up. At the end of the round, you should have 70 (77, 84, 93) stitches on the needles.
Continue next round working the eyelash and double knitting (face) sections as set but on this round start to work from chart in blue double knitting to represent the mouth. For newborn and infant sizes start on row 5 of the chart.
Work to end of chart.
Next in white only continue working eyelash yarn and double knitting sections straight untill
piece measures 3.5 (4.5, 5, 5.5) inches from the cast-on row.

Working only in eyelash yarn (knitting across double knit section with eyelash) begin the decreases as follows, switching to DPNs when the diameter of the hat is too small for your circular needle:
(Decrease) Row 1: *K8 (9, 10), K2tog*
Row 2: K all sts
(Decrease) row 3: *K7 (8, 9), K2tog*
Row 4: K all sts
(Decrease) row 5: *K6 (7, 8), K2tog*
Row 6: K all sts
Decrease in this manner until there are 35 sts on the needles.
Then decrease in the same manner, omitting the “k all sts” rows, until there are 7 sts remaining.
Pull yarn through the last 7 sts with a tapestry needle, pull through to inside and weave in end.


Horns.
With white double knitting yarn and 4.5mm needles cast on 15sts
Row 1 knit
Row 2 purl
Row 3 knit
Row 4 (k3,k2tog) three times
Row 5 knit
Row 6 purl
Row 7 (k2, k2tog) three times
Row 8 purl
Row 9 (k1, k2tog) three times
Row 10 k2tog three times, break yarn leaving long tail, thread through remaining 3 sts draw tight
to form a point secure and sew seam.

Eyes(make 2)
With black yarn and 4.5mm needles cast on 21 stitches loosely. Knit 3 rows. Pass all sts, 1 at a time, over first st. Cut yarn, leaving a long tail. Thread tail through remaining stitch; pull to tighten.

Inner Eye (make 2)
With white yarn and 4.5mm needles cast on 11 stitches loosely. Knit 3 rows. Pass all stitches 1 at a time over first as before.

Teeth(make 2)
With white yarn and 3.5mm needles cast on 6 sts.
Row 1 knit
Row 2 purl
Row 3 k2tog, k2, k2tog
Row 4 purl
Row 5 k2tog,k2tog
Row 6 purl
Row 7 k2tog, cut yarn leaving a long tail and thread through remaining stitch and secure.

Finishing
Using the photo as a guide sew eyes into position and make a french knot in the center using black yarn.
Sew teeth into positon on the blue of the mouth, attatch the horns and using black yarn embroider the nose.


Braids
Using white double knitting yarn, cut strands of yarn approx. 24 ( 24,36, 36) inches in length. ( at least 8 strands total)
Gather strands and find center.
Thread one end through center cast on stich of earflap , pulling even.
Separate strands into 3 equal sections and braid, making sure beginning is tight to earflap.
Secure ends with yarn or tiny pony tail elastic bands.
Trim ends even. Make pom pom using eyelash or double knitting yarn ad attach to ends of braids.


 Don’t go jumping out at any ramblers. Because they will think you are a yeti. Maybe. 😉


Daily Knitting Deals at Craftsy.com

Warm Pink Mittens

Mittens are a form of  winter wear that keeps the hands warm and come in a variety of styles. Unlike gloves they are easier to knit because they lack defined fingers other than the thumb. Mittens are one of the easiest garments to create because you only need to use minimal shaping techniques. Knitting mittens is much like knitting socks, they’re quick, easy, inexpensive, and make an ideal gift.This pattern is suitable for novice knitters. Once you’ve got the hang of it, you can customize the fit and design to the suit the needs of your intended recipient.
This pattern size is Teens/ Adult
To knit these mittens you will need:

1 ball Chunky Type Yarn
Knitting Needles: Size 5 mm (U.S. 8) or whichever needles you require to produce the tension given below.


Tension: 18 sts and 24 rows = 4 ins [10 cm] in stocking st.

Instructions:
Left Mitt: **Cast on 34 sts.

Row 1: (RS). K2. *P2. K2. Rep from * to end of row.
Row 2: P2. *K2. P2. Rep from * to end of row.
Rep these 2 rows K2. P2 ribbing for 2 ins (6 cm) ending on a 2nd row.


Box Pattern:
Row 1: * k2, P2 rep from * to end
Row 2: as row 1
Row 3: * P2, K2  rep from* to end
Row 4: as row 3
These four rowws form box pattern

Work 4 rows box pattern**
Shape thumb: 1st row: work 15sts in pattern. (M1. K1) twice. pattern to end of row.

2nd and alt rows: pattern but Purl thumb stitches.       

3rd row: pattern 15 sts. M1. K3. M1. pattern to end of row.

5th row: patten 15 sts. M1. K5. M1. pattern to end of row.

7th row: pattern 15sts. M1. K7. M1. pattern to end of row.

9th row: pattern15. M1. K9. M1. pattern to end of row. 44 sts.

11th row: pattern27. Turn. Cast on 1 st. P13 (including cast on st). Turn. Cast on 1 st. K14.

 ***Beg with a purl row, work 9 rows in stocking st.

 Next row: (K2tog) 7 times. Break yarn. Thread end through rem sts. Draw up and fasten securely. Sew thumb seam. With RS of work facing, join yarn to last st on right hand needle. Pick up and knit 2 sts at base of thumb. pattern across sts on left hand needle. 34 sts.

Cont even until work from top of ribbing measures 6 ins [15 cm] ending with RS facing for next row.

Shape top: 1st row: K1. Sl1. K1. psso. pattern 11. K2tog. K2. Sl1. K1. psso. pattern 11. K2tog. K1.

2nd and alt rows: Pattern (no shaping)

3rd row: K1. Sl1. K1. psso. pattern 9. K2tog. K2. Sl1. K1. psso. pattern 9. K2tog. K1.

 Cont in this manner, having 2 sts less between dec every alt row to 18 sts. Cast off purlways. Sew top and side seam.***


Right Mitt: Work from ** to ** as given for Left Mitt.

Shape thumb: 1st row: pattern18. (M1. K1) twice. pattern to end of row.

2nd and alt rows: patter but Purl across thumb sts.

3rd row: pattern 18. M1. K3. M1. pattern to end of row.

5th row: pattern 18. M1. K5. M1. pattern to end of row.

7th row: pattern 18. M1. K7. M1. pattern to end of row.

9th row: pattern 18. M1. K9. M1. pattern to end of row. 44 sts.

 11th row: patern 30. Turn. Cast on 1 st. P13 (including cast on st). Turn. Cast on 1 st. pattern14. Work from *** to *** as given for Left Mitt.

Mittens are an excellent project for using up all those leftover yarn scraps you don’t need special supplies, not much yarn. Why not donate a set of mitts to a Christmas gift fayre. Or if you’re looking to do a good deed, try knitting mittens to donate to charities in the winter months and help keep someone warm.
If you would like to knit these mittens for charity please see :

‘Thoughtful Thursday’ Warm Winter Project
‘Knitting to Help Bridge and Beyond’
‘Knit with loving hands’
knit with love‘ earlier posts also on this blog. These charities and many more like them, need your help.


‘Thoughtful Thursday’ Warm Winter Project.

The number of children orphaned each day in the world is around 10,000. More than half of the orphans live in the streets where they face many threats and risks. Unfortunately, orphans are kidnapped every day in many parts of the world, they are abused by prostitution gangs, organ mafia, begging networks and missionary institutions. Every orphan who is taken care of means that we will have a brighter future.


A plea from ‘Lily’ Love In the Language of Yarn!

This weekend I will be visiting an orphanage in Kayseri, Turkey with a group of volunteers. The orphange is home to 140 children at the moment, I will be  taking with me a parcel for each child. I have been busy knitting a ‘Lily’ Bear for each child, our volunteers have been busy knitting and crocheting and have been wonderful and donated hats, scarves and gloves for each child in the orphanage.
At present there are 5,166 orphans in orphanages throughout Turkey.

Knitters and Crocheters I need your help with our Warm Winter Project!

 We need hats, scarves, gloves, socks, sweaters etc. for orphans and children of low income familes. Age groups are 0-3yrs,  3-6yrs, 7-10yrs and 12-14yrs. Boys and Girls. We have teamed up with several organisations who will also be providing shoes/boots, stationery materials, coal and wood for heating, blankets, stoves, electric heaters, foodstuffs and other winter necessities. To help orphans and impoverished children spend the winter happily and in health.

Can you help?

We will be distributing knitted and crochet items throughout the winter months.
For more information on ‘LILY’ to can find us on facebook at: https://www.facebook.com/LilyLoveInTheLanguageOfYarn over the next couple of weeks we wiil be adding patterns and information so please check in regularly and please ‘Like’ us so you will receive up dates.

Please Help If You Can!


Here’s a free knitting pattern from Patons to help get you started.


MATERIALS:
  • Patons® Astra (50 g/1.75 oz)
Boy’s Version (all sizes)
  • Main Color (MC):
    • (Blue) 1 (1-1-3) ball(s)
  • Contrast A: (Variegated) 1 (1-1-3) ball(s)
  • Contrast B: (Orange) 1 (1-1-3) ball(s)
Girl’s Version (all sizes)
  • Main Color (MC):
  • (Red) 1 (1-1-3) ball(s)
  • Contrast A: (Variegated) 1 (1-1-3) ball(s)
  • Contrast B: (Yellow) 1 (1-1-3) ball(s)
Knitting Needles:
  • Hat and Scarf: Size 4 mm (U.S. 6) knitting needles or size needed to obtain tension.
  • Mittens: Set of size 4 mm (U.S. 6) double pointed knitting needles or size needed to obtain tension.
SIZES:
  • Scarf: 6 x 46 ins [15 x 117 cm].
  • Hat: To fit child 2/4 yrs (6/10 yrs).
  • Mittens: To fit child 2/4 yrs (6/8 yrs – 10 yrs).
TENSION
22 sts and 28 rows = 4 ins [10 cm] in stocking st.
ABBREVIATIONS
Alt = Alternate.
Beg = Beginning.
Cont = Continue(ity).
Dec = Decrease.
Inc = Increase 1 stitch by knitting into front and back of next stitch.
K = Knit.
K2tog = Knit 2 stitches together.
M1 = make one st by picking up horizontal loop lying before next st and knitting into back of loop.
M1P = make one st by picking up horizontal loop lying before next st and purling into back of loop.
P = Purl.
Pat = Pattern.
Psso = Pass slipped stitch over.
Rep = Repeat.
Rem = Remaining.
Rnd(s) = Round(s).
RS = Right side.
Sl1 = Slip next stitch knitwise.
St(s) = Stitch(es).
Tog = Together.
WS = Wrong side.
INSTRUCTIONS
The instructions are written for smallest size. If changes are necessary for larger size(s) the instructions will be written thus ( ). Numbers for each size are shown in the same color throughout the pattern. When only one number is given in black, it applies to all sizes.

Stripe Pat
With MC work 4 rows.
With A work 4 rows.
With B work 2 rows.
With MC work 2 rows.
With A work 4 rows.
These 16 rows form Stripe Pat.
EARFLAP HAT
First Ear Flap
With MC and pair of needles, cast on 10 sts.
1st row: (RS). Knit.
2nd row: P1. M1P. Purl to last st. M1P. P1.
3rd row: K1. M1. Knit to last st. M1. K1.
Rep last 2 rows twice more, then 2nd row once. 24 sts.
Work 12 rows even in stocking st, ending with RS facing for next row. Break yarn. Leave sts on a spare needle.
Second Ear Flap
Work as given for First Ear Flap. Do not break yarn.
Body of Hat: (Joining row). With MC, cast on 8 (9) sts. Knit these 8 (9) sts. K24 across Second Ear Flap. Turn. Cast on 35 (39) sts. Turn. K24 across First Ear Flap. Turn. Cast on 8 (9) sts. 99 (105) sts.
Purl 1 row.
With A, proceed as follows:
1st row: (RS). Purl
2nd and 3rd rows: Knit.
4th row: Purl.
Last 4 rows form Texture Pat.
Beg with 9th row of Stripe Pat, cont in Stripe Pat and rep last 4 rows of Texture Pat 7 times more, dec 2 (0) sts evenly across last row. 97 (105) sts.
Shape top: Keeping cont of Stripe Pat, proceed as follows:
1st row: K1. *K2tog. K10 (11). Rep from * to end of row. 89 (97) sts.
2nd and alt rows: Purl.
3rd row: K1. *K2tog. K9 (10). Rep from * to end of row. 81 (89) sts.
5th row: K1. *K2tog. K8 (9). Rep from * to end of row. 73 (81) sts.
6th row: Purl.

Cont in same manner, dec 8 sts on next and every following alt row 5 (6) times more. 25 sts.
Next row: K1. *K2tog. Rep from * to end of row. 13 sts.
Break yarn leaving a long end. Draw end through rem sts and fasten securely. Sew back seam.

Braid: (make 3).
Cut A, 15 ins [38 cm] long. Take 12 strands tog, fold in half and knot into fringe at end of each earflap and at top of Hat as shown in picture. Braid each Fringe. Knot securely and trim ends evenly.
MITTENS

RIGHT MITTEN
**With MC and set of four knitting needles, cast on 28 (36-44) sts. Divide sts on 3 needles as follows: 12 (12-16) sts on 1st needle, 8 (12-16) sts on 2nd needle and 8 (12-12) sts on 3rd needle. Join in rnd. Place marker on first st.
Beg with 1st row of Stripe Pat.
Proceed as follows:
1st rnd: *K1. P1. Rep from * around. Rep last rnd of (K1. P1) ribbing for 11/2 (2-2) ins [4 (5-5) cm] and inc 4 sts evenly across last rnd. 32 (40-48) sts.
Keeping cont of Stripe Pat, knit 6 (8-10) rnds.**
Shape thumb gusset: Cont in Stripe Pat, proceed as follows:
1st rnd: K16 (20-24). Inc 1 st in each of next 2 sts. Knit to end of rnd.
2nd and alt rnds: Knit.
3rd rnd: K16 (20-24). Inc 1 st in next st. K2. Inc 1 st in next st. Knit to end of rnd.
5th rnd: K16 (20-24). Inc 1 st in next st. K4. Inc 1 st in next st. Knit to end of rnd.
7th rnd: K16 (20-24). Inc 1 st in next st. K6. Inc 1 st in next st. Knit to end of rnd.
9th rnd: K16 (20-24). Inc 1 st in next st. K8. Inc 1 st in next st. Knit to end of rnd. 42 (50-58) sts.
11th rnd: K28 (32-36). Slip last 12 sts onto a safety pin (thumb opening). Knit to end of rnd.
12th rnd: Knit, casting on 2 sts over slipped sts. 32 (40-48) sts.
***Cont in Stripe Pat, knit in rnds until work from beg measures 6 (7-8) ins [15 (18-20.5) cm].
Rearrange sts as follows: 16 (20-24) sts on 1st needle. 8 (10-12) sts on 2nd needle. 8 (10-12) sts on 3rd needle.
Shape Top: 1st rnd: 1st needle: Sl1. K1. psso. Knit to last 2 sts. K2tog. 2nd needle: Sl1. K1. psso. Knit to end of needle. 3rd needle: Knit to last 2 sts. K2tog.
Dec 4 sts on every rnd, as before, until there are 8 sts. Break yarn, leaving a long end.
Thread end through rem 8 sts. Draw up and fasten securely.
Thumb: With MC, K12 from safety pin.
Pick up and knit 2 sts at base of thumb.
Divide these 14 sts onto 3 needles.
With MC, knit 9 (11-15) rnds.
Next rnd: (K2tog) 7 times.
Next rnd: (K2tog) 3 times. K1.
Break MC leaving a long end. Thread end through rem 4 sts. Draw up and fasten securely.***
LEFT MITTEN
Work from ** to ** as given for Right Mitten.
Shape thumb gusset: Cont in Stripe Pat, proceed as follows:
1st rnd: K14 (18-22). Inc 1 st in each of next 2 sts. Knit to end of rnd.
2nd and alt rnds: Knit.
3rd rnd: K14 (18-22). Inc 1 st in next st. K2. Inc 1 st in next st. Knit to end of rnd.
5th rnd: K14 (18-22). Inc 1 st in next st. K4. Inc 1 st in next st. Knit to end of rnd.
7th rnd: K14 (18-22). Inc 1 st in next st. K6. Inc 1 st in next st. Knit to end of rnd.
9th rnd: K14 (18-22). Inc 1 st in next st. K8. Inc 1 st in next st. Knit to end of rnd. 42 (50-58) sts.
11th rnd: K26 (30-34) sts. Slip last 12 sts onto safety pin (thumb opening). Knit to end of rnd.
12th rnd: Knit, casting on 2 sts over slipped sts. 32 (40-48) sts.
Work from *** to *** as given for Right Mitten.
SCARF
With MC and pair of needles, cast on 33 sts.
1st row: (RS). Purl.
2nd and 3rd rows: Knit.
4th row: Purl.
Last 4 rows form Texture Pat.
First 4 rows of Stripe Pat are complete.
Keeping cont of Stripe Pat, rep last 4 rows of Texture Pat until work from beg measures 46 ins [117 cm], ending with RS facing for next row. Cast off knitwise.
Fringe: Cut A 10 ins [25.5 cm] long. Take 4 strands tog, fold in half and knot into fringe 3/4 inch [2 cm] apart across each end of scarf. Trim fringe evenly.
Colorful Winter Set Pattern

Cable Braided Headband.

There are multiple ways of wearing this little accessory – around the head as a headband, around the neck as a necklace or around the wrist as a bracelet.  I made these headbands for my niece but you can make them any size by Knitting more or less multiples of 8 pattern rows.


Abbreviations: RS = right side
WS = Wrong side
St = St, sts = sts
K = K
P = P
K2tog = Knit 2 stitches together
Rep = Repeat
Beg = Beginning


Material:
Worsted yarn, Colour A, colour B, each 15-20 yards.
Needle: US 6/4.00mm
Darning needle
One button (optional)
Crochet hook (optional)
Guage: 5 sts and 6 rows / 1 inch (2.5cm)
Finished Size(sample in the piture): 19 inches/ 50 cm in length and 1 inch/3.5cm in width.
You can make any size you wish by knitting more or less multiple of 6 rows.

 Cabled Braids are made up by knitting 2 strips.

1st strip:

Using 4mm needles and yarn A cast on 9 sts.
Start by purling the 1st row. Work a total 7 rows straight in St st. 

Row 8 (RS): K4, yo, k2tog, k3.
Repeat previous 8 rows for a total of 14 times. Then work 15 rows in St st.
Cast off on the next row.

2nd strip:

Using 4mm needles and yarn B cast on 9 sts.
Start by purling the 1st row. Work a total of 15 rows straight in St st.

On next row (RS): K4, yo, k2tog, k3. Then work 7 rows in St st.
Repeat previous 8 rows for a total of 14 times. 

On the next row cast off all sts.

If you wish to make strips longer – repeat the sequence of 8 rows.

Lightly steam the strips to stop curling and straighten out.

Then follow the photo guide to braid your headband.

1. Insert the longer end of a strip into the first yarn over of the shorter end strip.


2. Then insert the top strip into the yarn over of the strip below (the first yo of the longer end strip).


3. Then continue inserting the top strip (they will alternate) into the next yarn over, make sure not to miss any and tug on them evenly.

The view from the under side.


4. Continue braiding and once finished you will get two different textures in the same braid. 


5. Using crochet hook take the ends of yarn and crochet a chain to make a loop to work as a buttonhole. I have flattened the edges of the strips and joined them together just by whip stitching. Sew on the button on the other end and weave in all ends.


Or join ends together and add a flower or bow and attatch by sewing on over the join.

Bow
With 4mm needles cast on 9 sts and work in St st for 8inches, cast off. Join the cast on and cast off ends together and arrange in the center of the under side.
With contrast yarn and 4mm needles cast on 5 sts work in St st for 4 inches , cast off. Join the head band ends together and using the photo as a guide attach the bow.


Flower
Join the head band ends together and attach flower to hide the seam. If you click on the link you will find three different size flower patterns or you can use your own favourite. I used the small flower pattern.


This idea came from olgajazzy’s free pattern for cable braided necklace. I made some changes and added a knitted flower or a bow to make headband for a little girl.  You can see the original pattern at: http://olgajazzzy.blogspot.com/2010/12/cable-braided-necklace.html.


Pink Wave Keyhole Scarf

Lock in the warmth with this new scarf style that is comfortable and easy to wear when temperatures take a dip. A keyhole scarf is basically a scarf with a hole in it. One end of the scarf is put through the hole to keep it in place around your neck without being bulky. This Pink Wave Keyhole Scarf is a quick and easy knit scarf pattern and makes a great gift as the colder weather approaches.     

You Will Need:
100grms Double knit type yarn in Main colour
50grms Double knit type yarn in Contrast colour
Size 4mm needles.

Scarf
First Half
Cast on 36st in Main clour
Row 1 Knit
Row 2 Purl
Row 3 Knit
Row 4 Purl
Row 5 K2tog, 3 times,(yo,K1) 6 times, K2tog 6 times, (yo, K1) 6 times, K2tog 3 times
Row 6 Knit
These 6 rows form the pattern
Change to contrast colour and work 6 rows of pattern
Change to main colour and work 6 rows of pattern
Change to contrast colour and work 6 rows of pattern
Change to main colour and work 6 rows of pattern
( 3 ‘waves’ in main colour and two in contrast)

Change to knit 2, Purl 2 Rib and work 8 rows.

Work Keyhole


Rib 18 sts place remaining 18 sts on holder.


Turn, working on these 18 sts only, continue in Rib

and work 22 rows, ending in middle of piece. Cut yarn and place sts on holder.

With right side facing, join yarn to 18 sts on holder. Rib for 22 rows, ending at side edge.

Turn, Rib18 sts, then Rib across 18 sts on holder.

Turn, Rib even until work measures 42 cm from the begining. Place stitches on holder.

Second Half

Cast on and work same as for first half of scarf, omitting keyhole.
Work even until piece measures same as first half.

FINISHING

Join with 3-Needle Bind off as follows:
Slip sts from first half onto knitting needle. With wrongsides facing, and points of both needles pointing to the right,
use spare needle to * knit the first st from the front
needle together with the first st from the back needle.
Knit the next st from each needle in the same manner, then bind off 1 st. Repeat from * until all sts have been bound off. Fasten off last st. Weave in yarn ends.

As this month is Breast Cancer Awareness Month I chose to knit this in pink and white. This scarf is a stylish way to show your support.
Enjoy Your knitting!