Mini Christmas Stocking

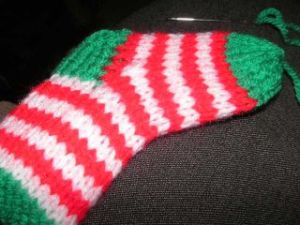
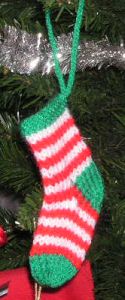
Perfect for your tree, to give as a gift, or as a cute gift tag, this adorable mini stocking ornament makes good use of those odds and ends of yarn. It’s a fun, quick knit that can be whipped up in an hour or two by most knitters.

I  worked it on double pointed needles because during heel shaping you need to switch from working one side to the other. You can knit it on regular needles but slide the work across onto a second needle at appropriate time. Apart from the stocking top it is worked in stocking stitch (knit on right side and purl on reverse)
Materials:
oddments of yarn. I prefer to knit these on 3.50 mm needles with double knit type yarn but the pattern will knit up with whatever you prefer.
Note, obviously the larger the needle size and thicker the yarn, the larger the finished stocking. Before you start, decide which colour you are going to knit the heel in and cut a length at least 110cm (44”) keep to one side for second heel shaping*.
Instructions:
 With green Cast on 25 sts,
rows 1 – 3: knit
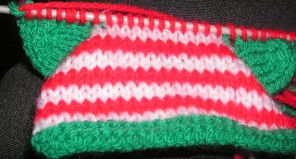
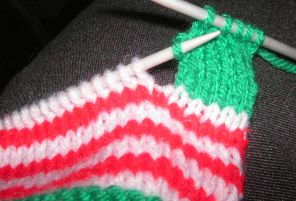
row 4: (right side) begin pattern  in St st alternate 2 rows white 2 rows red
work a total of 14 rows of pattern ending with a wrong side row.
Heel shaping:
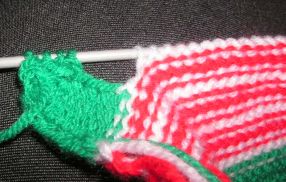
I like to use different coloured yarn to accentuate heel. The heel is worked in 2 halves.
row 18: with right side facing, k7 and turn leaving remaining stitches on needle
row 19: slip 1, p6
repeat these 2 rows 3 more times until 8 rows of heel have been worked
row 26: k3, k2tog through the back, k1, turn leaving 1 remaining stich of heel on needle

row 27: slip 1, p4
row 28: k2, k2tog through the back, turn leaving remaining 2 stiches on needle
row 29: slip 1, p2
row 30: k2, k2tog through the back, k1, turn
row 31: slip 1, p3
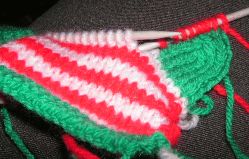
leaving these 4 stitches on needle with the main part of the stocking, slide all the work along needle, turn with wrong side facing and resume working the other side of the heel.

reverse row 18: with wrong side facing and using 110cm length of yarn cut earlier*, p7 and turn leaving remaining stitches on needle
reverse row 19: slip 1, k6
repeat these 2 rows 3 more times until 8 rows of heel have been worked
reverse row 26: p3, p2tog, p1, turn leaving 1 remaining stich of heel on needle
reverse row 27: slip 1, k4
reverse row 28: p2, p2tog, turn leaving remaining 2 stiches on needle
reverse row 29: slip 1, k2
reverse row 30: p2, p2tog, p1, turn
reverse row 31: slip 1, k3
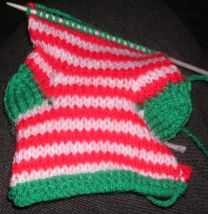
row 32: with right side facing rejoin main colour of pattern (red) and begin knitting across first 4 stitches of heel shaping, pick up 5 stitches from inside edge of heel

 knit 11 stitches across main part of stocking, pick up 5 stitches from inside edge of 2nd heel half and knit final 4 stitches (29 stitches on needle)

keeping to stripe pattern
row 33: purl
row 34: K8, k2tog, k9, k2tog through the back, k8
row 35: p7, p2tog through the back, p9, p2tog, p7
row 36: K6, k2tog, k9, k2tog through the back, k6 (23 stitches)
row 37: purl
work 8 rows
row 46: with right side facing change colour for toe cap and work 2 rows

row 48: K3, K2tog through the back, k4, k2tog, k1, k2tog through the back, k4, k2tog, k3
row 49: purl
row 50: K3, K2tog through the back, k2, k2tog, k1, k2tog through the back, k2, k2tog, k3 (15 stitches)
row 51: purl
Making Up:
Cut work from the ball leaving a long end for sewing up. Thread end through 15 stitches on needle  and pull up tight.

Join seam running up bottom and back of stocking using mattress stitch.
Turn inside out and tie up all ends securely and trim – no need to sew them in. Turn right side out.
Hanging loop:  with crochet hook make chain stitch or cast on 35 stitches and then cast them off. Double strip over to make a loop and sew to back of stocking.

Rudolf Slippers Free Knitting Pattern

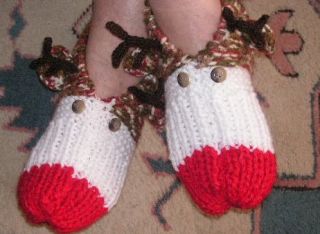
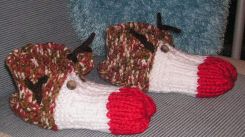
Celebrate Christmas with everybody’s favorite reindeer! These Rudolph slippers are great for giving as a gift.

You Will Need:

1 skein of Chunky type yarn any color. I chose a mottled yarn in browns and greens.
1 skein of chunky white
Small amount of chunky red
Small amunt of double knit type yarn in brown
2 buttons for eyes
Size 10 (6mm)knitting needles, large plastic needle, regular sewing needle and thread and 2 decorative buttons. This makes one pair of slippers.


Tension 4 sts and 6 rows (3 garter stitch ridges) = 1 inch

Available in small, medium and large size

Outer Moc:
Cast on 29 (35-41) sts with mottled yarn
Row 1: Knit across.
Row 2: K9(11-13), *P1,K9(11-13), repeat from *once more.
Repeat rows 1 and 2 until  20 (24-28) rows have been knit.
Change to white and work until 30 (34.38) rows have been knit

Shape Toe:
continue in white
Row 1: P1, *K1,P1, repeat from *across row
Row 2: K1, *P1,K1, repeat from *across row
Repeat these 2 rows until you have 6 rows (8-10) then change to red and work 6 (4-6) rows then work row 1 once more, cut off yarn leaving an 8” end.

Finishing:
Draw 8” end through remaining sts and pull up tightly, then sew with large plastic needle from beginning of ribbing to form toe. Fold cast one edge in half and sew inside seam for center back

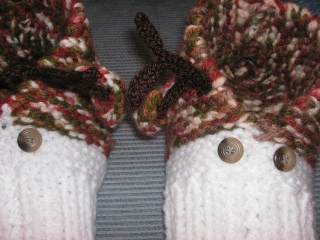
To make the antlers I used a 4 st i-cord. After working 4 rows, I slipped 2 sts to a cable needle, working with the remaining 2 sts on my working needles, increased using the Make 1 increase. The next row, I increased again to regain 4 sts. After 4 rows, I repeated the above and once I had regained 4 sts a second time I broke my yarn, wove it through my remaining sts and pulled tight and secured. I then picked up my first 2 sts from the cable needle and working in i-cord, increase using Make 1 (3 sts) work 4 rows and break yarn, weave through remaining sts, pull tight and secure. Repeat for 2 set of slipped sts on cable needle for 2nd antler branch. Repeat for all four antlers.

 I had great fun knitting these Rudolf slippers hope you do too!

Knit A Christmas Bookmark

Make a bookmark for yourself or someone special.

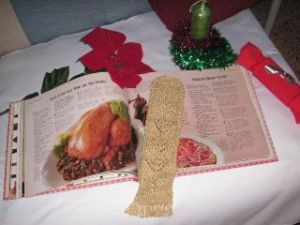
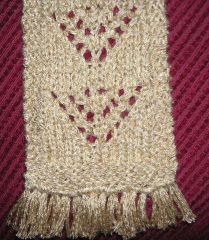
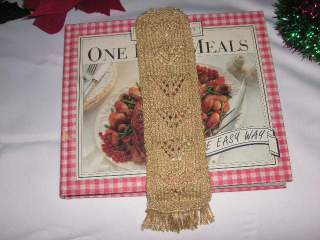
 Bookmarks are very fashionable these days and are a great gift for the readers in your life. With super fine yarn, and a little ingenuity, this simple bookmark can be made by anyone. There are no fancy stitches needed for this project, this lace pattern is very easy but effective so you don’t have to be an expert to finish it. The finished project will resemble a miniature scarf.
I chose a gold colour with a shiny gold thread running through it, but knit in any color this is a great, useful and quick project.


You will need:

Size 3.25mm Needles
Cotton type yarn.
Gauge: 8 sts = 1inch St st on 3.25mm needles
although gauge is not essential for this project.


cast on 19 sts and work 8 rows knit.

Begin Pattern:
Row 1.  (RS) knit
Row 2. and all wrong side rows K3, P13, K3
Row 3.  Knit
Row 5. K7, K2tog, yo,K1, yo, ssk, K7
Row 7. K6,K2tog, yo, K3, yo, ssk, K6
Row 9. K5,( k2tog, yo,) twice, K1, (yo, ssk,) twice, K5
Row 11. K4, (K2tog, yo,) twice, K3, (yo, ssk,) twice K4
Row 13. K3, (K2tog, yo) three times, K1, (yo, ssk) three times, K3
Row 14. K3, P13, K3
These 14 rows form the pattern repeat 6 or 7 times to rquired length

Shape Top:
Row 1. Knit
Row 2. (K3, K2tog) 3 times, K4 (16sts)
Row 3-5 Knit
Row 6. K2tog twice, K8, K2tog twice (12sts)
Row 7-9 Knit
Row 10 K2tog twice, K4, K2tog twice (8sts)
Row 11. Knit
Cast off.

Finishing:
Fringe bottom edge as desired.
Press or block.

“ssk” means “slip, slip, knit”–that is, slip 2 sts one at a time as if to knit, put left needle through the front of these two sts, and knit them together through their back loops.


I hope you will enjoy knitting this little project as much as  I did.


                        Happy Knitting…Enjoy!


Rudolf The Red Nose Reindeer Slippers

Today I sat on the floor in the middle of my livingroom with all my left over yarn arround me trying to decide what to make to try and reduce my stash. I decided I could use some slippers.Then it hit me!  and I had great fun knitting these Rudolf slippers!

You Will Need:

1 skein of Chunky type yarn any color. I chose a mottled yarn in browns and greens.
1 skein of chunky white
Small amount of chunky red
Small amunt of double knit type yarn in brown
2 buttons for eyes
Size 10 (6mm)knitting needles, large plastic needle, regular sewing needle and thread and 2 decorative buttons. This makes one pair of slippers.


Tension 4 sts and 6 rows (3 garter stitch ridges) = 1 inch

Available in small, medium and large size

Outer Moc:
Cast on 29 (35-41) sts with mottled yarn
Row 1: Knit across.
Row 2: K9(11-13), *P1,K9(11-13), repeat from *once more.
Repeat rows 1 and 2 until  20 (24-28) rows have been knit.
Change to white and work until 30 (34.38) rows have been knit


Shape Toe:
continue in white
Row 1: P1, *K1,P1, repeat from *across row
Row 2: K1, *P1,K1, repeat from *across row
Repeat these 2 rows until you have 6 rows (8-10) then change to red and work 6 (4-6) rows then work row 1 once more, cut off yarn leaving an 8” end.


Finishing:
Draw 8” end through remaining sts and pull up tightly, then sew with large plastic needle from beginning of ribbing to form toe. Fold cast one edge in half and sew inside seam for center back

To make the antlers I used a 4 st i-cord. After working 4 rows, I slipped 2 sts to a cable needle, working with the remaining 2 sts on my working needles, increased using the Make 1 increase. The next row, I increased again to regain 4 sts. After 4 rows, I repeated the above and once I had regained 4 sts a second time I broke my yarn, wove it through my remaining sts and pulled tight and secured. I then picked up my first 2 sts from the cable needle and working in i-cord, increase using Make 1 (3 sts) work 4 rows and break yarn, weave through remaining sts, pull tight and secure. Repeat for 2 set of slipped sts on cable needle for 2nd antler branch. Repeat for all four antlers.

Celebrate Christmas with everybody’s favorite reindeer! These Rudolph slippers are great for giving as a gift.

Snowman Tree Ornament

Twelve Days Of Christmas Ornaments.
Day Twelve: Snowman Tree Ornament.

Use up your stash and knit this clever little snowman just in time for the holiday season. Knit as tree ornaments, gift toppers, or just to decorate your house this season.

Gauge:Not vital use larger needles and bulky weight yarn for a bigger ornament or smaller needles and double knit type yarn for a smaller one.

Gauge:
Not vital

Materials:
Small amount of red and white double knit type yarn
Needles appropriate to the yarn

Instructions

With White, CO 6 sts.
Row 1: K
Row 2: K1, k into front and back of next st, k2, knit into front and back of next st, k1 – 8 sts
Row 3: K
Row 4: K1, k into front and back of next st, k4, knit into front and back of next st, k1 – 10 sts
Row 5: K
Row 6: K1, k into front and back of next st, k6, knit into front and back of next st, k1 – 12 sts
Rows 7-13:K
Row 14: K1, ssk, k6, k2tog, k1 – 10 sts
Row 15:K
Row 16: K1, ssk, k4, k2tog, k1 – 8 sts
Row 17:K
Row 18: K1, ssk, k2, k2tog, k1 – 6 sts
Row 19:K
Row 20: k1, k into front and back of next st, k2, k into front and back of next st, k1 – 8 sts
Row 21: K
Row 22: k1, k into front and back of next st, k4, k into front and back of next st, k1 – 10 sts
Rows 23-27: K
Row 28:K1, ssk, k4, k2tog, k1 – 8 sts
Row 29: K
Row 30:K1, ssk, k2, k2tog, k1 – 6 sts
Row 31: K
Row 32:K1, ssk, k2tog, k1 – 4 sts
Row 33: K
Row 34: K1, k into front and back of next 2 sts, k1 – 6 sts
Row 35:K
Row 36: K1, k into front and back of next st, k2, k into front and back of next st, k1 – 8 sts
Rows 37-39: K
Row 40: K1, ssk, k2, k2tog, k1 – 6 sts
Row 41: K
Row 42: K1, ssk, k2tog, k1 – 4 sts
Row 43: ssk, k2tog – 2 sts
BO. Leave long tail and use to make loop for hanging.

Scarf
With Red, CO 45 sts. BO.
Hat
With Red, CO 8st knit 2rows,
BO 2 sts begning of next 2 rows
Knit 4 rows and BO.

Finishing
Make two french knots for eyes, one for nose, and 4 down center of body for buttons. Use a running stitch to make mouth. Sew hat in place. Wrap scarf around neck.

<><><>

<>I made a little SNOWMAN;
He had a cheery smile.
I dressed him in a hat and scarf,
then went inside a while.
A STORM came up,
the wind was fierce;
My snowman was so CHILLY!
<>
<>He said he’d love to come inside,
but wouldn’t that be SILLY?
I told him he was made of snow,
and though he felt BEFUDDLED,
If I agreed and brought him in,
he’d turn into a PUDDLE!

<>

Mini Christmas Stocking

Twelve Days Of Christmas Ornaments.
Day Eleven: Mini Christmas Stocking.

Perfect for your tree, to give as a gift, or as a cute gift tag, this adorable mini stocking ornament makes good use of those odds and ends of yarn. It’s a fun, quick knit that can be whipped up in an hour or two by most knitters.

I  worked it on double pointed needles because during heel shaping you need to switch from working one side to the other. You can knit it on regular needles but slide the work across onto a second needle at appropriate time. Apart from the stocking top it is worked in stocking stitch (knit on right side and purl on reverse)
Materials:
oddments of yarn. I prefer to knit these on 3.50 mm needles with double knit type yarn but the pattern will knit up with whatever you prefer.
Note, obviously the larger the needle size and thicker the yarn, the larger the finished stocking. Before you start, decide which colour you are going to knit the heel in and cut a length at least 110cm (44”) keep to one side for second heel shaping*.
Instructions:
 With green Cast on 25 sts,
rows 1 – 3: knit
row 4: (right side) begin pattern  in St st alternate 2 rows white 2 rows red
work a total of 14 rows of pattern ending with a wrong side row.
Heel shaping:
I like to use different coloured yarn to accentuate heel. The heel is worked in 2 halves.
row 18: with right side facing, k7 and turn leaving remaining stitches on needle
row 19: slip 1, p6
repeat these 2 rows 3 more times until 8 rows of heel have been worked
row 26: k3, k2tog through the back, k1, turn leaving 1 remaining stich of heel on needle

row 27: slip 1, p4
row 28: k2, k2tog through the back, turn leaving remaining 2 stiches on needle
row 29: slip 1, p2
row 30: k2, k2tog through the back, k1, turn
row 31: slip 1, p3
leaving these 4 stitches on needle with the main part of the stocking, slide all the work along needle, turn with wrong side facing and resume working the other side of the heel.

reverse row 18: with wrong side facing and using 110cm length of yarn cut earlier*, p7 and turn leaving remaining stitches on needle
reverse row 19: slip 1, k6
repeat these 2 rows 3 more times until 8 rows of heel have been worked
reverse row 26: p3, p2tog, p1, turn leaving 1 remaining stich of heel on needle
reverse row 27: slip 1, k4
reverse row 28: p2, p2tog, turn leaving remaining 2 stiches on needle
reverse row 29: slip 1, k2
reverse row 30: p2, p2tog, p1, turn
reverse row 31: slip 1, k3
row 32: with right side facing rejoin main colour of pattern (red) and begin knitting across first 4 stitches of heel shaping, pick up 5 stitches from inside edge of heel

 knit 11 stitches across main part of stocking, pick up 5 stitches from inside edge of 2nd heel half and knit final 4 stitches (29 stitches on needle)

keeping to stripe pattern
row 33: purl
row 34: K8, k2tog, k9, k2tog through the back, k8
row 35: p7, p2tog through the back, p9, p2tog, p7
row 36: K6, k2tog, k9, k2tog through the back, k6 (23 stitches)
row 37: purl
work 8 rows
row 46: with right side facing change colour for toe cap and work 2 rows

row 48: K3, K2tog through the back, k4, k2tog, k1, k2tog through the back, k4, k2tog, k3
row 49: purl
row 50: K3, K2tog through the back, k2, k2tog, k1, k2tog through the back, k2, k2tog, k3 (15 stitches)
row 51: purl
Making Up:
Cut work from the ball leaving a long end for sewing up. Thread end through 15 stitches on needle  and pull up tight.

Join seam running up bottom and back of stocking using mattress stitch.
Turn inside out and tie up all ends securely and trim – no need to sew them in. Turn right side out.
Hanging loop:  with crochet hook make chain stitch or cast on 35 stitches and then cast them off. Double strip over to make a loop and sew to back of stocking.
Here’s a photo of my tree with all knitted ornaments.

Christmas Star Ornament

Twelve Days Of Christmas Ornaments.
Day Ten: Christmas Star Ornament.

Who doesn’t love homemade christmas  crafts? You may remember the handmade ornaments that filled your grandparents’ tree. You may also have a few treasured ornaments that you made in elementary school. You probably enjoy reminiscing as you pull out the ornaments each year and hang them on the tree. It’s never too late to make new ornaments, and here is a star to add to your collection.

This is a pretty star knitted in simple lace. Make as a tree decoration, or hang in front of windows to show the world your knitting skills.
Materials:
4mm needles
Approx 10g of Double Knitting Weight Yarn
To Make:
Cast on 10 sts and K 1 row.
2nd row: Sl1, Inc1 (knit into front and back of the stitch), *yf, K2tog; rep from * to last 2 sts, K2tog.
3rd row: K to end.

Rep the 2nd and 3rd rows twice more.
Cast off.
Repeat 4 more times
Arrange all 5 pieces in star shape and sew together.
Make hanging loop and sew to one of the star points.

This star is so pretty and knits up so quick, done in barely an hour!

Hang em’ everywhere…

I-Cord Candy Cane

Twelve Days Of Christmas Ornaments.
Day Nine: Candy Cane.

Everyone loves a candy cane – especially one that can be hung year on the tree year after year without getting sticky and is sugar free!

Materials:
red yarn
white yarn (scrap yarn is fine. you will not need a lot of yardage, unless you are going to make hundreds)
two double pointed needles that are the appropriate size for yarn. (or, one circular needle that you can slide the yarn from end to end.)
wire

Gauge:  doesn’t  matter. It will differ depending on the yarn you use, thinner yarn=smaller candy canes, thicker yarn=bigger candy canes.

Instructions:

Cast on 5 white (slide)
*knit 4 white, and 1 red, (slide)
knit 3 white, 1 red, 1 white (slide)
knit 2 white, 1 red, 2 white (slide)
knit 1 white, 1 red, 3 white (slide)
knit 1 red, 4 white (slide) *
Repeat from * until you have a cane as long as you would like.
When the cane is the length that you are happy with, then cast off. The cast off stitches will look like a straight line. So you will need to weave in the tail. Take the tail, and begin by weaving in the stitch opposite of where the tail is, to form the last row into a tube. Sew through all the stitches, gathering them up. Then bury the yarn in the middle of the chord itself.
To give the cane a little structure, I took a piece of wire, and carefully stuck it into the middle of the i-chord.

These cute little ornaments knit up in a jiffy, and once you have the technique down, you can do them in as many different widths, color and stripe combinations as you want!

Have fun Knitting!

Mini Christmas Parcels

Twelve Days Of Christmas Ornaments.
Day Eight: Mini Christmas Parcels.

A cute parcel approximately 1 ½” cubed, to hang from your tree. Alternatively, make several and place in a bowl as a pretty centrepiece. Christmas ornaments make great gifts, or you can choose to decorate your mantel with classic ornaments that you’ve proudly created on your own.

Materials:
Double Knit type Yarn in main colour and small amount in contrast.
Size 3.50mm needles.
Stuffing.

Instructions:
Cast on 10 sts and work 27 rows stocking (stockinette) stitch.
Cast on 10 stitches at the beginning of the next two rows and work 11 rows stocking stitch.
Cast off 10 stitches at the beginning of the next two rows.
Work 13 rows stocking stitch.

To Make Up:
Sew up the box, leaving an opening to stuff.
Stuff the box and sew the remaining seam(s)

For the ribbon I used a crochet hook, with contrast coloured yarn and made chain stitch till required length or you could cast 140 sts, Knit 1 row and cast off. Then tie around the parcel cross at the back finishing with a bow at the front.

 Happy Knitting!

Mini Christmas Tree

Twelve Days Of Christmas Ornaments.
Day Seven: Mini Christmas Tree.

 Here’s a lovely knitted Christmas tree ornaments to hang from the Christmas tree, wear on your lapel, on key ring or use as package trims.

Materials:

small amount of  double knit type yarn, in green, or your color choice
small amount of dark color for tree trunk
small amount of any yarn for embroidery , or sew on sequins, small buttons or beads as ornaments
small amount of pillow stuffing , or cotton balls.
US size 7 ( 4.5mm) needles.

Gauge: 5 sts and 6 rows = 1 inch

Directions:

Starting at bottom of tree, with color desired for tree, cast on 15 sts.
Knit across.
Row 2 : K 1, K 2 tog, K across row.
Row 3: K 1, P 2 tog, P across to last st, P 1.
Rows 4, 5, 6, & 7: Repeat rows 2 & 3. ( 9 sts)
Row 8: Cast on 2 sts at beg of row, then K 1, K 2 tog, K across row.
Row 9: Cast on 2 sts at beg of row, then K 1, P 2 tog, P across to last st, K 1.
Rows 10, 11, 12, 13 : Repeat rows 2 & 3. ( 7 sts)
Row 14 : Repeat row 8.
Row 15: Repeat row 9.
Rows 16 & 17: Repeat rows 2& 3.
Repeat these last 2 rows until 3 sts remain. Turn, then knit these last 3 sts tog.
Fasten off.

Make another tree side in same manner.

Embroider stars, ornaments, or sew on beads , small buttons as desired, on front of tree.

Sew the 2 sides of trees tog, leaving bottom open. Stuff lightly with pillow stuffing, then sew bottom closed.

Sew on a hanging loop at top of tree ornament.

Tree trunk:

With dark color yarn, cast on 4 sts. K 2 rows, bind off. Sew narrow end of trunk to bottom center of stuffed tree.