Thoughtful Thursday- Knit for Syrian Refugees

The violence in Syria is escalating as Assad responds to rebel military gains with airstrikes and artillery bombardment, killing hundreds every day. In Turkey, the authorities have built 13 camps and are planning three more to house the refugees. More than 133,888 Syrians entered Turkey,  11,909 Syrians are staying in Hatay, 14,747 in Gaziantep province, 12,959 in Kilis, 30,665 in Şanlıurfa province, 12,520 in Kahramanmaraş, 7,859 in Osmaniye and 2,339 in Adiyaman. A total of 578 Syrians are staying in various Turkish hospitals and receiving medical treatment, 40,312 dispersed in other regions of Turkey. The nightly temperatures at the moment are around 5 degrees C. let’s try and send them a little comfort and the knowledge that someone is thinking of them.

photo by Todays Zaman


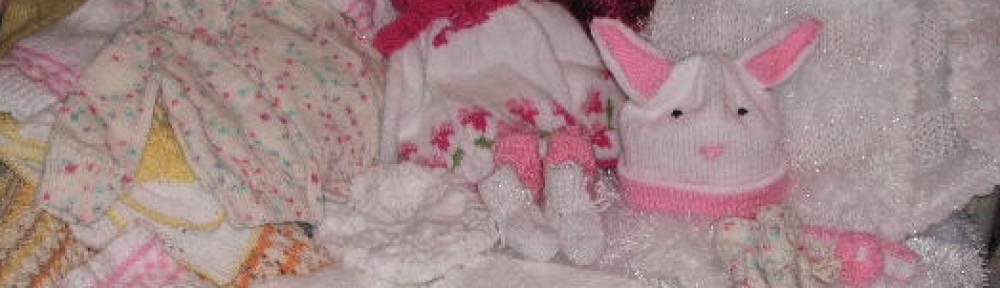
Help ‘Lily’ Love In the Language of Yarn Knit Squares to make blankets for Syrian refugees especially the children.


Please consider making a square or two with your odds and ends. Any spare wool you have can be knitted into eight inch squares and then we’ll stitch them all together into a blanket. No waste and a child with nothing gets a warm and colourful, cover for their bed!


Knitting Instructions

FOR ONE 8″/20 cms SQUARE, you will need:
Yarn from a 100 gram (3.5 oz) ball of yarn or scraps of yarn 
 worsted weight , double knit or 8ply

Size 4mm needles  6 (USA)
A yarn sewing needle.
 Cast on 32 stitches (try to make your stitches neither too loose nor too tight to help ensure uniform squares)
 Row 1: knit
 Row 2: knit. These two rows form the ‘garter’ stitch knitting pattern for your square but you use any stitch you prefer, beascreative as you like. Continue knitting  until you have knitted a square
 To ensure you square is 8″/20cm either use a tape measure .


 Cast off
 Use your yarn sewing needle to sew in all the yarn ends using a darning method

VERY IMPORTANT 
Leave a one metre length of your yarn attached to your work after you have cast off. This will be used to join the squares together.
 but if you’re changing colors work in your other tails.  DO NOT TIE AND CUT IMMEDIATELY AFTER THE KNOT, THAT IS GUARANTEED TO COME UNDONE.  Knot if you want, but leave a tail and work in your ends.


We work with reputable, experienced relief agencies to securely transport and distribute our hand-knit and crocheted blankets for this project we are working with  Humanitarian Relief Foundation. 
You can also find us at:  https://www.facebook.com/LilyLoveInTheLanguageOfYarn


Please Help If You Can!

‘Lily’ is supported by businesses and individuals in Turkey, whether it be donations of yarn, Knitting and Crocheting or transportation of completed blankets to receiving agencies.
‘Lily’ has no paid employees.  All the good work is done on a strictly volunteer basis.
‘Lily’ wishes to thank all those private individuals and businesses which support us.  Without you, there would be no ‘Lily’ – Love In the Language of Yarn.  We work hard for the day when we are no longer needed to help keep Children warm.

Dianne Jones – Founder of  ‘Lily’- Love In the Language of Yarn.

Address – ‘LILY’ C/O Dianne Jones
                   Türkmen Mahlesi
                    Ünlü sokak No 10 D4
                    Kuşadası
                    Aydin
                    Turkey.


Wednesday Question: How To Join Knitted Squares?


All knitters have questions about the best way to do things, why different things happen while they are knitting, how to fix knitting mistakes and more.
Here is this weeks question  This is a question I was asked yesterday during a charity knit in-  How do you join knitted squares together?

Answer: 

I have been doing this for some time and i have seen quite a few ways of joining the squares, and some methods of joining them are better than others. This is the method I preferI as it is a very secure method of joining and is quite unobtrusive both visually and comfort wise.
Place your squares so that the direction of knit for each one is perpendicular to the next one, so one vertical and its neighbours horizontal, as below. If you’re a quilter then it’s like ‘post and rail’.
Place your squares flat on a table, right side up and arrange the colours in a pleasing manner.
Thread a wool needle with either a long length of yarn leftover from the cast on or bind off, or join in a new length, about one and a half times the length of the section you will be stitching.

Start with a figure of 8 knot into each corner stitch, from the right side down and through then

up over to the other side and right side down and through again. Repeat this twice so that each of the 2 corners has been stitched twice.

Next you’ll start joining the two selvedges, one is a garter stitch side edge and the other will be a cast on or bind off edge. If you look closely you’ll see what i’ve done.

Matching stitch on one side by knitted row on the other, you pick up a horizontal bar from each side in turn, pull the thread all the way through for each stitch and pull the stitch firm but not tight. Choose an edge stitch or at most one knit stitch in from the edge. Sometimes you have to make a decision as to which one to choose but try to make a rule for yourself so that you always choose the same way.
When it’s done right you’ll find that the stitches disappear and the end result is very neat and flat, see below. I found this method a little tedious at first while i was learning it, but now i love it as the final wrap looks lovely and i know it’s going to stay together for many years no matter what harsh treatment it gets.
I have been doing this for some time and i have seen quite a few ways of joining the squares, and some methods of joining them are better than others. This is the method I preferI as it is a very secure method of joining and is quite unobtrusive both visually and comfort wise.
Place your squares so that the direction of knit for each one is perpendicular to the next one, so one vertical and its neighbours horizontal, as below. If you’re a quilter then it’s like ‘post and rail’.
Place your squares flat on a table, right side up and arrange the colours in a pleasing manner.
Thread a wool needle with either a long length of yarn leftover from the cast on or bind off, or join in a new length, about one and a half times the length of the section you will be stitching.

Start with a figure of 8 knot into each corner stitch, from the right side down and through then

up over to the other side and right side down and through again. Repeat this twice so that each of the 2 corners has been stitched twice.

Next you’ll start joining the two selvedges, one is a garter stitch side edge and the other will be a cast on or bind off edge. If you look closely you’ll see what i’ve done.
Matching stitch on one side by knitted row on the other, you pick up a horizontal bar from each side in turn, pull the thread all the way through for each stitch and pull the stitch firm but not tight. Choose an edge stitch or at most one knit stitch in from the edge. Sometimes you have to make a decision as to which one to choose but try to make a rule for yourself so that you always choose the same way.
When it’s done right you’ll find that the stitches disappear and the end result is very neat and flat, see below. I found this method a little tedious at first while i was learning it, but now i love it as the final wrap looks lovely and i know it’s going to stay together for many years no matter what harsh treatment it gets.
These 4 squares have all been stitched together this way, can you see the stitches in the seams? No lumpy seams to rub on the child or frail elderly person who ends up with this wrap. Also the squares cannot be pulled apart without a lot of intricate effort.
Weave all the ends in on the wrong side by following the line of knit for about 8 stitches then back again to the edge. 

If you have a knitting question for Knitting Galore, please email it to : dbjones5559@hotmail.co.uk  or  Please  post it as a comment here.  All questions will be answered, and many are selected and answered each wednesday here on the Blog. 


Saturday Stitch: Zig Zag Stockinette Stitch

Every Saturday I will share with you a new stitch.
Today’s stitch is: Zig Zag Stockinette Stitch


This is a variation of the traditional twisted stockinette stitch. Similar to the regular twisted stitch, the right side rows are knit through the back loop. However, to create the zigzag effect in this variation, the stitches on the wrong side rows are worked as they appear (simply purled the regular way).
The twisted stockinette stitch and its variations create a thick, stable and durable fabric and are especially suitable for homeware projects (pillows,throws etc) or great for accessories such as handbags. 
You can use any number of stitches + 2 edge stitches.

Instructions:

Row 1: edge st, knit across through back loop to last st, edge st
Row 2: edge st, purl across to last st, edge st
Repeat rows 1 and 2.
Difficulty level: Easy

Help Wrap A Child In Love !

Winter is the perfect time for knitting so why not knit for a good cause?
Knit a square and help wrap a child in love.


There are more than 126,000 Syrian refugees in Turkey, all have fled from the violence of Syria’s civil war. Many of the refugees are children who have seen violence themselves. 


So let’s try and send them a little comfort and the knowledge that someone is thinking of them. 


Please consider making a square or two with your odds and ends. Any spare wool you have can be knitted into eight inch squares and then we’ll stitch them all together into a blanket. No waste and a child with nothing gets a warm and colourful, cover for their bed!

Knitting Instructions

FOR ONE 8″/20 cms SQUARE, you will need:
Yarn from a 100 gram (3.5 oz) ball of yarn or scraps of yarn 
 worsted weight , double knit or 8ply

Size 4mm needles  6 (USA)
A yarn sewing needle.
 Cast on 32 stitches (try to make your stitches neither too loose nor too tight to help ensure uniform squares)
 Row 1: knit
 Row 2: knit. These two rows form the ‘garter’ stitch knitting pattern for your square but you use any stitch you prefer, beascreative as you like. Continue knitting  until you have knitted a square
 To ensure you square is 8″/20cm either use a tape measure .


 Cast off
 Use your yarn sewing needle to sew in all the yarn ends using a darning method

VERY IMPORTANT 
Leave a one metre length of your yarn attached to your work after you have cast off. This will be used to join the squares together.
 but if you’re changing colors work in your other tails.  DO NOT TIE AND CUT IMMEDIATELY AFTER THE KNOT, THAT IS GUARANTEED TO COME UNDONE.  Knot if you want, but leave a tail and work in your ends.


You can also find us at:  https://www.facebook.com/LilyLoveInTheLanguageOfYarn


Please Help If You Can!


‘Lily’ is supported by businesses and individuals in Turkey, whether it be donations of yarn, Knitting and Crocheting or transportation of completed blankets to receiving agencies.
‘Lily’ has no paid employees.  All the good work is done on a strictly volunteer basis.
‘Lily’ wishes to thank all those private individuals and businesses which support us.  Without you, there would be no ‘Lily’ – Love In the Language of Yarn.  We work hard for the day when we are no longer needed to help keep Children warm.

Dianne Jones – Founder of  ‘Lily’- Love In the Language of Yarn.

Address – ‘LILY’ C/O Dianne Jones
                   Türkmen Mahlesi
                    Ünlü sokak No 10 D4
                    Kuşadası
                    Aydin
                    Turkey.

Cuddle A Snugglily

Everyone loves something to cuddle. These very soft pillow toys are hand knit and would make a perfect gift for baby, toddler or a unique Christmas gift! 

The Snugglily’s are shaped making the pillow easy to grip, but soft enough to place a sleepy head on, doubles as a soft toy and decorative pillow. The features are hand embroidered (no loose objects). 100% acrylic, stuffed with polyester fiberfill and can be machine washed and dried on cool setting. Measurements are approx 15inches (38cm) high and 12inches (30.5cm).

30 turkish Lira which is approx 10 pounds sterling (15 USD) price includes p&p


I will ship all items via  First Class mail within 3 business days of receiving your order. Each item will come with a postal tracking number.
I want you to be 100% happy with your purchase. If it is not exactly what you imagined, I am happy to work with you to make it right! I take great pride in my handcrafted treasures and want you to love them as much as I loved creating it.

I will accept items for return, repair or exchange (if available) within 5 days of receipt. However, buyer will be responsible for all shipping costs. Please contact me first to discuss the details of the situation so I can be prepared and give you an appropriate timeframe on repairs. Again, shipping charges are not refundable.

Exception : Custom orders are NOT returnable or refundable. I make all items myself and many hours of love, hard work and attention to detail goes into each and every item. I take great pride in what I make and endeavour to make every item perfect.


Snugglilies make great gifts for special occasions such as birthdays, Christenings, Christmas, Thanksgiving etc and also “just because”.

I use high quality materials to ensure  Snuggliles have a long life span and live up to the high demands of children and equally  want to provide you with great value for money. I aim for my products to be reasonable priced; and all proceeds will go to help fund ‘Lily’ Love In the Language of Yarn a non profit organisation providing hand knitted and crochet items for children in need. 
All items are well packaged and protected for posting.


If for any reason your  mailing address does not match your Pay-Pal address, please leave a note upon checking out to avoid any confusion and delays in processing your order.

IMPORTANT NOTE: Please be sure you provide me with your correct delivery address, as I cannot be responsible for your items once they are have been shipped, thank you for understanding.


Please contact me if you  would like an item making in specific colours / have any special request. I am more than happy to make items to order. You can contact me by leaving a comment on this page, knitting Galore facebook pageLily facebook page or email dbjones5559@hotmail.co.uk

Choice
Santa Rudolph Snowman Kitty Puppy Froggy Owl Giraffe Elephant Duckling


Purchase Pattern Only If you would prefer to knit your own  Snugglily you can purchase the knitting pattern here for 
only  4 Turkish Lira (under 1.50 pounds, 2 USD). Again all proceeds will go to help fund ‘Lily’ Love In the Language of Yarn a non profit organisation providing hand knitted and crochet items for children in need. 
 All efforts are made to make these patterns effort free.
This is a knitting pattern in PDF document format.


Knitting Pattern.

Choice
Santa Rudolph Snowman Kitty Puppy Froggy Owl Giraffe Elephant Duckling


The pattern will be e-mailed to you within 24 hours of receiving payment. So please ensure that you provide your correct e-mail address.

Knit A Square – Help Warm A Child!

More than 126,000 Syrians have registered with the Turkish government as refugees – part of the 440,000 registered refugees who have fled to countries that are Syria’s neighbors.  Most of the displaced people in the camps are children. All have fled the violence of Syria’s civil war. Many have seen violence themselves. Some have lost relatives, and most have trouble sleeping and panic when they hear loud noises or airplanes.
 We expect the situation to get worse when winter hits, lowering temperatures and sending rains that could turn the camps into a muddy bog.


So let’s try and send them a little comfort and the knowledge that someone is thinking of them. Please keep the squares and blankets coming! 

Help ‘Lily’ Love In the Language of Yarn Knit Squares For Syrian refugees especially the children.

Please consider making a square or two with your odds and ends. Any spare wool you have can be knitted into eight inch squares and then we’ll stitch them all together into a blanket. No waste and a child with nothing gets a warm and colourful, cover for their bed!


Knitting Instructions

FOR ONE 8″/20 cms SQUARE, you will need:
Yarn from a 100 gram (3.5 oz) ball of yarn or scraps of yarn 
 worsted weight , double knit or 8ply

Size 4mm needles  6 (USA)
A yarn sewing needle.
 Cast on 32 stitches (try to make your stitches neither too loose nor too tight to help ensure uniform squares)
 Row 1: knit
 Row 2: knit. These two rows form the ‘garter’ stitch knitting pattern for your square but you use any stitch you prefer, beascreative as you like. Continue knitting  until you have knitted a square
 To ensure you square is 8″/20cm either use a tape measure .


 Cast off
 Use your yarn sewing needle to sew in all the yarn ends using a darning method

VERY IMPORTANT 
Leave a one metre length of your yarn attached to your work after you have cast off. This will be used to join the squares together.
 but if you’re changing colors work in your other tails.  DO NOT TIE AND CUT IMMEDIATELY AFTER THE KNOT, THAT IS GUARANTEED TO COME UNDONE.  Knot if you want, but leave a tail and work in your ends.


We work with reputable, experienced relief agencies to securely transport and distribute our hand-knit and crocheted blankets for this project we are working with  Humanitarian Relief Foundation. 
You can also find us at:  https://www.facebook.com/LilyLoveInTheLanguageOfYarn


Please Help If You Can!


‘Lily’ is supported by businesses and individuals in Turkey, whether it be donations of yarn, Knitting and Crocheting or transportation of completed blankets to receiving agencies.
‘Lily’ has no paid employees.  All the good work is done on a strictly volunteer basis.
‘Lily’ wishes to thank all those private individuals and businesses which support us.  Without you, there would be no ‘Lily’ – Love In the Language of Yarn.  We work hard for the day when we are no longer needed to help keep Children warm.

Dianne Jones – Founder of  ‘Lily’- Love In the Language of Yarn.

Address – ‘LILY’ C/O Dianne Jones
                   Türkmen Mahlesi
                    Ünlü sokak No 10 D4
                    Kuşadası
                    Aydin
                    Turkey.


‘Thoughtful Thursday’ ‘Lily’ Needs Squares For Syrian Refugees.

More than 126,000 Syrians have registered with the Turkish government as refugees – part of the 440,000 registered refugees who have fled to countries that are Syria’s neighbors.  Most of the displaced people in the camps are children. All have fled the violence of Syria’s civil war. Many have seen violence themselves. Some have lost relatives, and most have trouble sleeping and panic when they hear loud noises or airplanes.
 We expect the situation to get worse when winter hits, lowering temperatures and sending rains that could turn the camps into a muddy bog.


So let’s try and send them a little comfort and the knowledge that someone is thinking of them. Please keep the squares and blankets coming! 

Help ‘Lily’ Love In the Language of Yarn Knit Squares For Syrian refugees especially the children.

Please consider making a square or two with your odds and ends. Any spare wool you have can be knitted into eight inch squares and then we’ll stitch them all together into a blanket. No waste and a child with nothing gets a warm and colourful, cover for their bed!


Knitting Instructions

FOR ONE 8″/20 cms SQUARE, you will need:
Yarn from a 100 gram (3.5 oz) ball of yarn or scraps of yarn 
 worsted weight , double knit or 8ply

Size 4mm needles  6 (USA)
A yarn sewing needle.
 Cast on 32 stitches (try to make your stitches neither too loose nor too tight to help ensure uniform squares)
 Row 1: knit
 Row 2: knit. These two rows form the ‘garter’ stitch knitting pattern for your square but you use any stitch you prefer, beascreative as you like. Continue knitting  until you have knitted a square
 To ensure you square is 8″/20cm either use a tape measure .


 Cast off
 Use your yarn sewing needle to sew in all the yarn ends using a darning method

VERY IMPORTANT 
Leave a one metre length of your yarn attached to your work after you have cast off. This will be used to join the squares together.
 but if you’re changing colors work in your other tails.  DO NOT TIE AND CUT IMMEDIATELY AFTER THE KNOT, THAT IS GUARANTEED TO COME UNDONE.  Knot if you want, but leave a tail and work in your ends.


We work with reputable, experienced relief agencies to securely transport and distribute our hand-knit and crocheted blankets for this project we are working with  Humanitarian Relief Foundation. 
You can also find us at:  https://www.facebook.com/LilyLoveInTheLanguageOfYarn


Please Help If You Can!


‘Lily’ is supported by businesses and individuals in Turkey, whether it be donations of yarn, Knitting and Crocheting or transportation of completed blankets to receiving agencies.
‘Lily’ has no paid employees.  All the good work is done on a strictly volunteer basis.
‘Lily’ wishes to thank all those private individuals and businesses which support us.  Without you, there would be no ‘Lily’ – Love In the Language of Yarn.  We work hard for the day when we are no longer needed to help keep Children warm.

Dianne Jones – Founder of  ‘Lily’- Love In the Language of Yarn.

Address – ‘LILY’ C/O Dianne Jones
                   Türkmen Mahlesi
                    Ünlü sokak No 10 D4
                    Kuşadası
                    Aydin
                    Turkey.


Wednesday Question: Can You Recommend a Buttonhole?

All knitters have questions about the best way to do things, why different things happen while they are knitting, how to fix knitting mistakes and more.
 Here is this weeks question  from Shirley. I never know which buttonhole to use can you recommend one?

Answer:  There are several options. The simplest way to knit a buttonhole is to make an eyelet: just knit 2 stitches together, then bring the yarn over the needle. On the next row, work the yarn over like a regular stitch. This makes a small hole, and it’s appropriate for smallish buttons, baby clothes. It works well in a garter stitch button band, where it is concealed by the ridges of the garter stitch. 


The one-row buttonhole is a firm horizontal buttonhole that is self-edging.


 Bring yarn to the front of work. Slip one stitch purlwise, and then bring yarn to the back of work. Slip the next stitch, and then pass your previously slipped stitch over it. This makes one cast-off stitch for your buttonhole—repeat these two steps until you have cast off enough stitches for the desired width of your buttonhole. Turn your work. Using a cabled cast on, cast on as many stitches as you cast off plus one additional stitch. For example, if you previously cast off 4 stitches, you will want to cast on 5 new stitches using the cabled cast on. Turn your work. With yarn at the back of work, slip one stitch from your left needle onto your right needle, then pass the extra cast-on stitch from your right needle over it. This closes the buttonhole—make sure that you pull your yarn a bit to tighten the hole and prevent gaps. Continue your row according to your chosen stitch pattern.

The two-row buttonhole makes a slit like opening, suitable for larger buttons  but it is loose and you may want to edge it with a buttonhole stitch to reinforce its weak corners and keep it from stretching excessively.


On the first row, cast off enough stitches for the desired width of your buttonhole. The two-row buttonhole is easier to make than the one-row buttonhole, but it is looser and you may want to edge it with a buttonhole stitch to reinforce its weak corners and keep it from stretching excessively.
 On the next row, cast on the same number of cast off stitches from the previous row to create the top edge of the buttonhole.
Using a buttonhole stitch*, stitch your way around the buttonhole. This will stabilize the buttonhole and keep its edges neat.

If you have a knitting question for Knitting Galore, please email it to : dbjones5559@hotmail.co.uk  or  Please  post it as a comment here.  All questions will be answered, and many are selected and answered each wednesday here on the Blog. 

Saturday Stitch: Mosaic Diamonds

Every Saturday I will share with you a new stitch.
Today’s stitch is: Mosaic Diamonds


Rows of large moss stitch diamonds and chains of small stockinette diamonds form this mosaic knitting stitch. Lovely on a sweater, scarf, throw, plillow etc.  You need a stitch number multiple of 12 + 1 + 2 edge stitches. Repeat the pattern between the * as many times as you like.

Instructions.

Row 1: edge st, * (k1, p3) x 3; repeat from * to last 2 sts, k1, edge st
Row 2: edge st, p1, * (k3, p1) x 3; repeat from * to last st, edge st
Row 3: edge st, * (p1, k1, p3, k1) x 2; repeat from * to last 2 sts, p1, edge st
Row 4: edge st, k1, * (p1, k3, p1, k1) x 2; repeat from * to last 2 sts, edge st
Row 5: edge st, * p2, (k1, p3) x 2, k1, p1; repeat from * to last 2 sts, p1, edge st>
Row 6: edge st, k1, * k1, p1, (k3, p1) x 2, k2, repeat from * to last st, edge st
Row 7: edge st, * p3, k1, p1, k3, p1, k1, p2; repeat from * to last 2 sts, p1, edge st
Row 8: edge st, k1, * k2, p1, k1, p3, k1, p1, k3, repeat from * to last st, edge st
Row 9: edge st, * p4, k5, p3; repeat from * to last 2 sts, p1, edge st
Row 10: edge st, k1, * k3, p5, k4; repeat from * to last st, edge st
Row 11: same as row 7
Row 12: same as row 8
Row 13: same as row 5
Row 14: same as row 6
Row 15: same as row 3
Row 16: same as row 4
Row 17: same as row 1
Row 18: same as row 2
Row 19: edge st, * k4, p2, k1, p2, k3; repeat from * to last 2 sts, k1, edge st
Row 20: edge st, p1, * p3, k2, p1, k2, p4; repeat from * to last st, edge st
Row 21: edge st, * k3, p2, k1, p1, k1, p2, k2; repeat from * to last 2 sts, k1, edge st
Row 22: edge st, p1, * p2, k2, p1, k1, p1, k2, p3; repeat from * to last st, edge st
Row 23: edge st, * k2, p2, k1, p3, k1, p2, k2; repeat from * to last 2 sts, k1, edge st
Row 24: edge st, p1, * p2, k2, p1, k3, p1, k2, p2; repeat from * to last st, edge st
Row 25: same as row 21
Row 26: same as row 22
Row 27: same as row 19
Row 28: same as row 20
Repeat rows from 1 through 28.
Difficulty level: Medium

Wednesday Question: What Is Duplicate Stitch?


All knitters have questions about the best way to do things, why different things happen while they are knitting, how to fix knitting mistakes and more.
 Here is this weeks question  from Lilian Marshall. What is duplicate stitch?

Answer:  Duplicate stitch, also called Swiss darning, allows you to go back over your knitted stitches with a different colour. When you do duplicate stitch carefully, you can’t even tell that the stitches weren’t knit in the contrasting color (at least, not without scrutiny). The basic concept of Duplicate Stitch is in its name. You sew over your finished knitting with a contrast colour, “duplicating” the original knit stitches. It’s much easier than fair-isling or intarsia.

 
To work duplicate stitch, you need a finished piece in stockinette stitch, a good yarn needle, and some contrasting yarn of the same weight as the knitted piece.
If you want to plan out your strategy, a good method is to mark the stitches you’re going to “duplicate” with an erasable fabric pen. Otherwise, you can just wing it…


Bring your needle from the back of the work to the front through the bottom point of a stitch, or a “V”. (Leave a generous tail in the back so you can weave it in at the end.)
Next, thread the needle across the stitch ABOVE the one you are dupicating.
And then insert the needle back into the bottom of the “V”, the same place where you began. One stitch duplicated! 


 Do the same thing for the next stitch. Start at its bottom point, sew across the stitch above it, and back down your starting place.
If you want to duplicate vertically adjacent stitches, you’ll have to sew under both the original stitch and the duplicate stitch. That’s ok.
Keep going until you’re done.
 Have Fun!!


If you have a knitting question for Knitting Galore, please email it to : dbjones5559@hotmail.co.uk  or  Please  post it as a comment here.  All questions will be answered, and many are selected and answered each wednesday here on the Blog.